Professional Email Hosting With Your Own Domain
With Thexyz Webmail you can have email hosted with your own domain name as long as long as you have registered the domain, the domain does not need to be registered with us to host email with a custom domain. If the domain is not registered through Thexyz, you will need to edit your DNS records as per the guide below to enable domain-based email. These directions are the same for all email accounts hosted with us: Thexyz Webmail, MobileSync, and Microsoft Exchange accounts (except Office 365). They are required when you create an email with your own domain name. to send mail and access your email. If you do not currently have a domain name to connect your email to, you can buy a domain name with us and automatically add it to your email hosting plan or the email address you created. The domain does not need to be registered or transferred to Thexyz to use our email service. We support all domain registrars on our hosted email environment.
1. Edit MX Records (required)
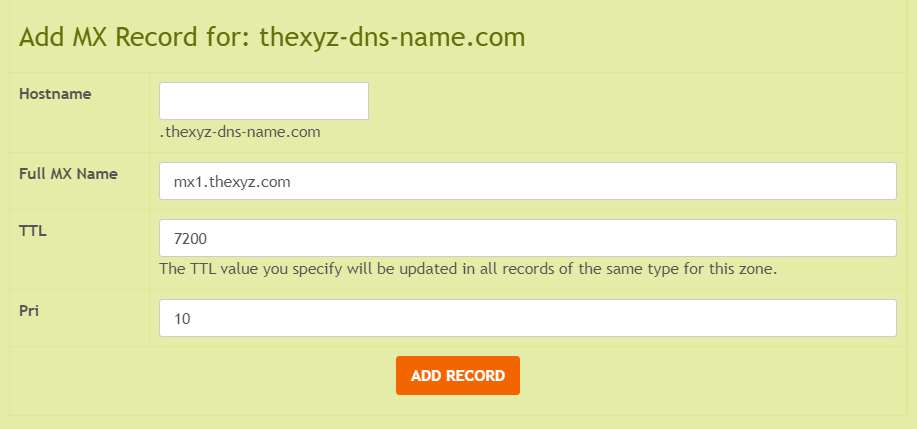
This is a required change to your domain name to enable sending and receiving on your domain name through our mail servers. If you are not sure what MX records to use, you can use the default MX records.
What is an MX record?
An MX record is a type of DNS record that defines which mail servers are used to deliver email that is sent to anyone on your domain. In order to create a custom email address for your domain to be able to send and receive emails through SMTP servers or create email aliases, you will need to update the MX record values through your DNS host to point to Thexyz. The two MX records are listed below with the priority numbers. The MX records required will depend on your mail service and whether you have our spam filtering upgrade enabled. Below are the default MX records, for more information please see, MX records for custom domain email.
| MX Record for domains with filtering | Priority | TTL |
|---|---|---|
| mx1.thexyz.com | 10 | Lowest possible or 7200 |
| mx2.thexyz.com | 20 | Lowest possible or 7200 |
| mx3.thexyz.com | 30 | Lowest possible or 7200 |
| mx4.thexyz.com | 40 | Lowest possible or 7200 |
| Default MX Record | Priority | TTL |
|---|---|---|
| mx1.emailsrvr.com | 10 | Lowest possible or 7200 |
| mx2.emailsrvr.com | 20 | Lowest possible or 7200 |
You should also delete any existing MX records as they will interfere when you try to connect your email.

We have some additional step-by-step guides for demonstrating how to edit your MX records when your web hosting or DNS is hosted with WordPress.
2. Add An SPF Record (recommended)
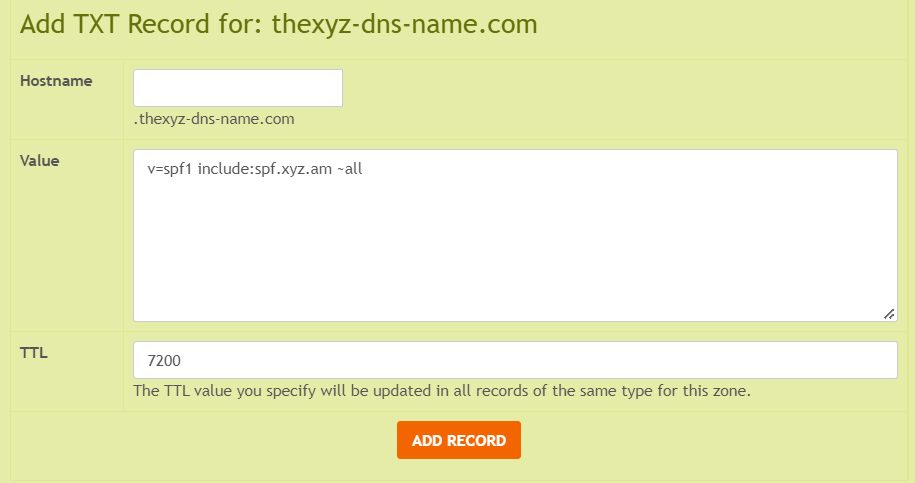
Ensure your outbound email reaches email inboxes and not the spam folder by adding an SPF record to your DNS will allow you to specify the email servers you use to send email from your domain. This validates your sending domain email address when you send mail, which can help to keep your domain’s email out of your recipients’ spam folders and keeps email protected. To add the SPF record you need to add a TXT record via your domain DNS hosting and point to the following:
TXT Record: v=spf1 include:spf.xyz.am ~all
Host name: Either @ or blank
TTL: (7200)

3. Enable DKIM Authentication (recommended)
We highly recommend setting up DKIM on your domain to ensure your email is protected against spoofing. This also allows third-party email service providers to check mail authentication against your public DNS records. To generate DKIM keys you will need to log in to the Email Administration Portal: https://admin.thexyz.com
Please check the guide below to enable DKIM on your domain.
4. Add Autodiscover Setup (optional)
Autodiscover is a service that allows users to easily configure their email client knowing only their email address and password. This makes setting up email on different clients and devices much easier. Each time you add accounts to mail clients, you will only need to enter the email address and password if the software supports autodiscover.
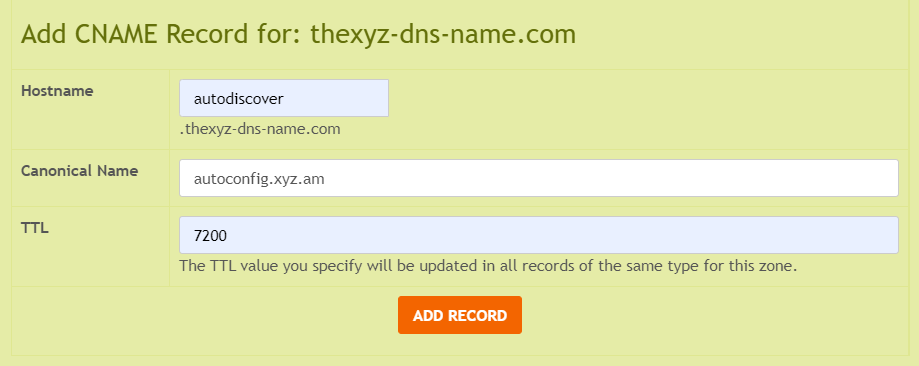
Login to where your domain is registered or DNS hosted and create the following CNAME record:
Record Type: CNAME
Host name: autodiscover
TTL: Lowest possible or 7200
Address: autodiscover.emailsrvr.com

Once entered, click add and you have set up autodiscover for your professional email address.
Note: Some DNS providers require your full domain name in the hostname field; e.g. if your domain is example.com, your hostname would be autodiscover.example.com

