1. Upload and Install the Plugin
- Access your WordPress Dashboard: Start by logging into your WordPress admin panel.
- Navigate to Plugin Installation:
- Go to Plugins > Add New.
- Click the Upload Plugin button at the top of the page.
- Choose the plugin zip file you've previously downloaded and click Install Now.
2. Activate the Plugin
- Once the installation is complete, you'll see a link to Activate Plugin. Click on it to activate the plugin on your WordPress site.
3. Configure Sendy Integration Settings
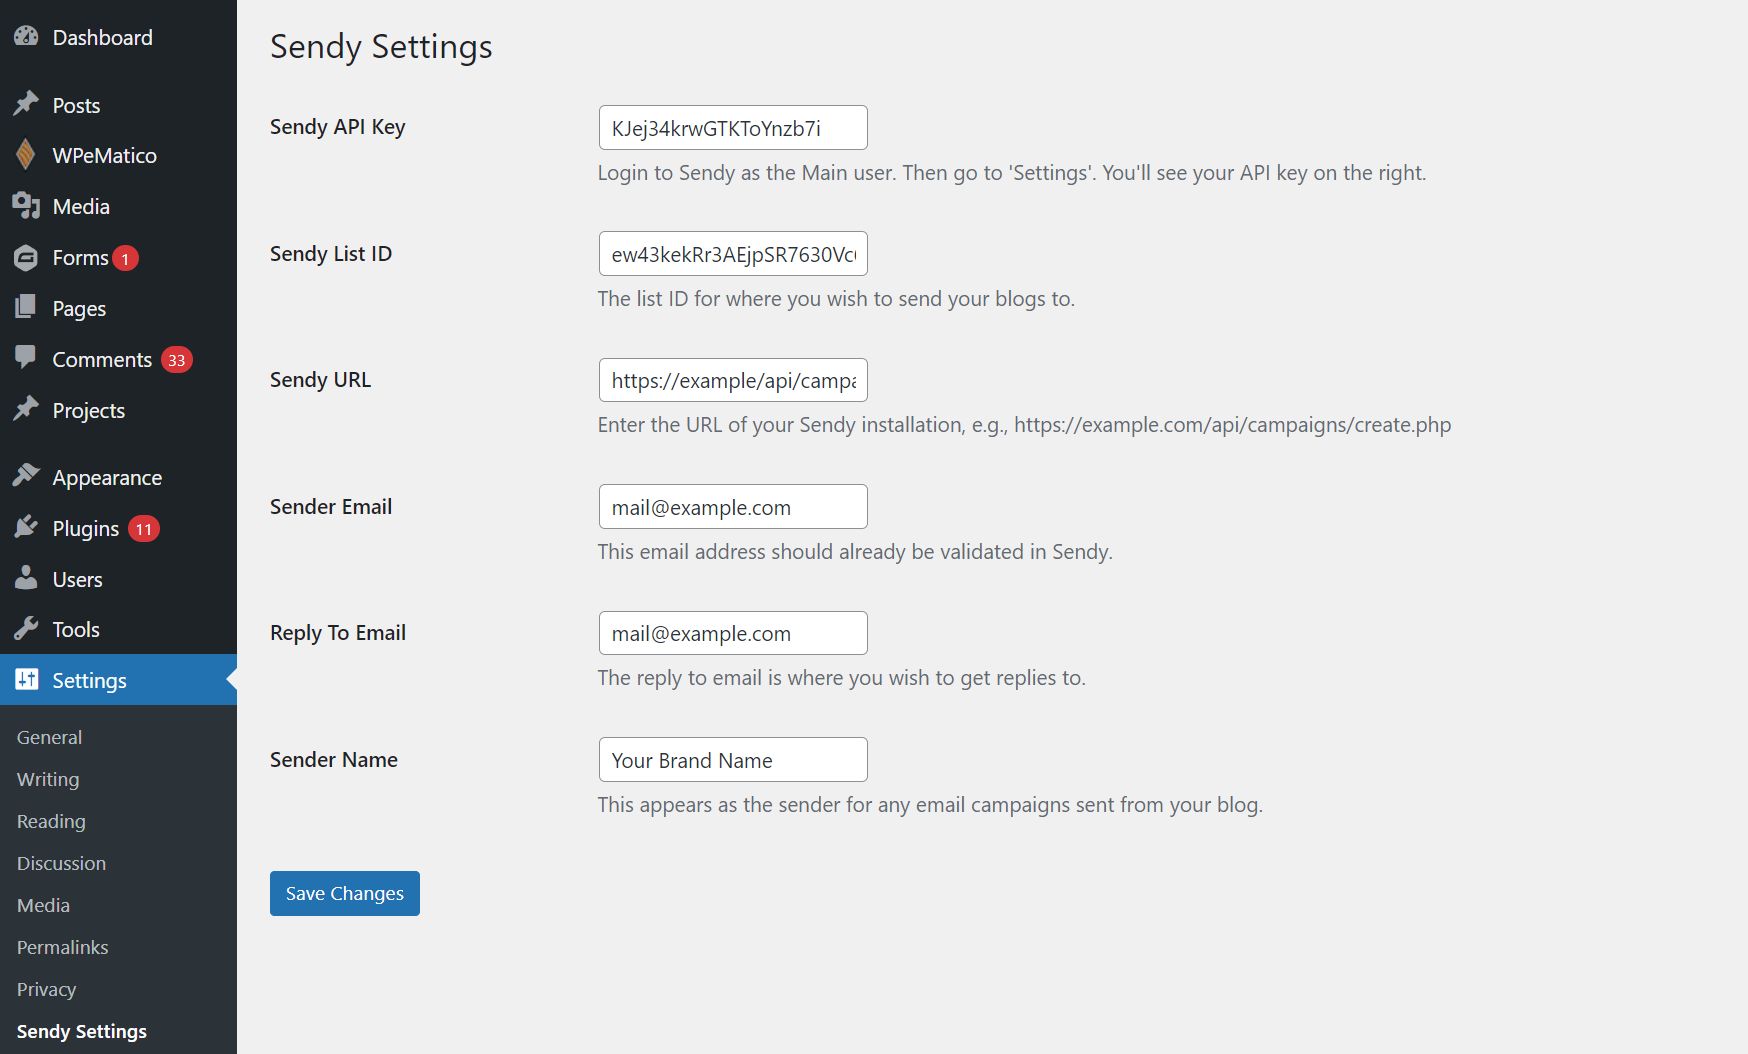
- Access Sendy Settings:
- Navigate to Settings > Sendy Settings from your WordPress admin dashboard.
- Enter Configuration Details:
- Sendy API Key: Find this in your Sendy installation under Settings.
- List ID: This is the ID of the list you want to send campaigns to. Found under 'View all lists' in Sendy.
- Sendy URL: The URL where your Sendy application is hosted followed by
/api. - Sender Email: This should be an email that is authorized in your Sendy settings.
- Reply-To Email: Email address where you want to receive replies.
- Sender Name: The name that appears as the sender in outgoing emails.
- Click the Save Changes button to apply your settings.
4. Manage Sendy Campaign Options in Posts
- When creating or editing a WordPress post, locate the Sendy Campaign Options meta box on the right-hand side.
- Use the checkbox labeled Disable sending this post to Sendy if you do not want the post to be sent as an email campaign.
5. Save and Test Your Post
- After configuring your post settings, click the Update or Publish button to save your changes.
- To test, create a new post or update an existing one and ensure it triggers the Sendy campaign according to your configurations.
6. Troubleshooting and Support
- If you experience any issues during the installation or configuration, consult the detailed plugin documentation. If problems persist, reach out to Thexyz support team for professional assistance.
7. Final Steps
- Congratulations! Your Sendy Auto Campaign Plugin is now ready to automate the sending of your WordPress posts as email campaigns. Enjoy the streamlined process and focus more on creating engaging content for your audience.
