This provisioning module for WHMCS utilizes the Mailcow API. The module allows offering email domains as a service. When active, customers can create mailboxes and aliases within their plan limits. The module provides standard provisioning functionality to automatically create, terminate, suspend, and unsuspend domains using native WHMCS provisioning logic. Additionally, the module supports the Change Package function and displays mailboxes and aliases management sections in the client area.
2. Requirements
- WHMCS version 8.6 or higher
3. Installation
- Download and extract the Mailcow module package.
- Upload the extracted files to the
modules/servers/mailcowdirectory of your WHMCS installation. - In the WHMCS admin area, navigate to Setup > Products/Services > Servers.
- Add a new server and select the "Mailcow" module from the "Module Name" dropdown.
- Configure the server with your Mailcow API URL, API Key, and License Key.
Note: A valid license key is required to activate the module. Enter the license key provided to you when configuring the server settings.
4. Configuration
To configure the Mailcow module:
- In the WHMCS admin area, navigate to Setup > Products/Services > Products/Services.
- Create a new product or edit an existing one.
- Go to the Module Settings tab.
- Select "Mailcow" from the "Module Name" dropdown.
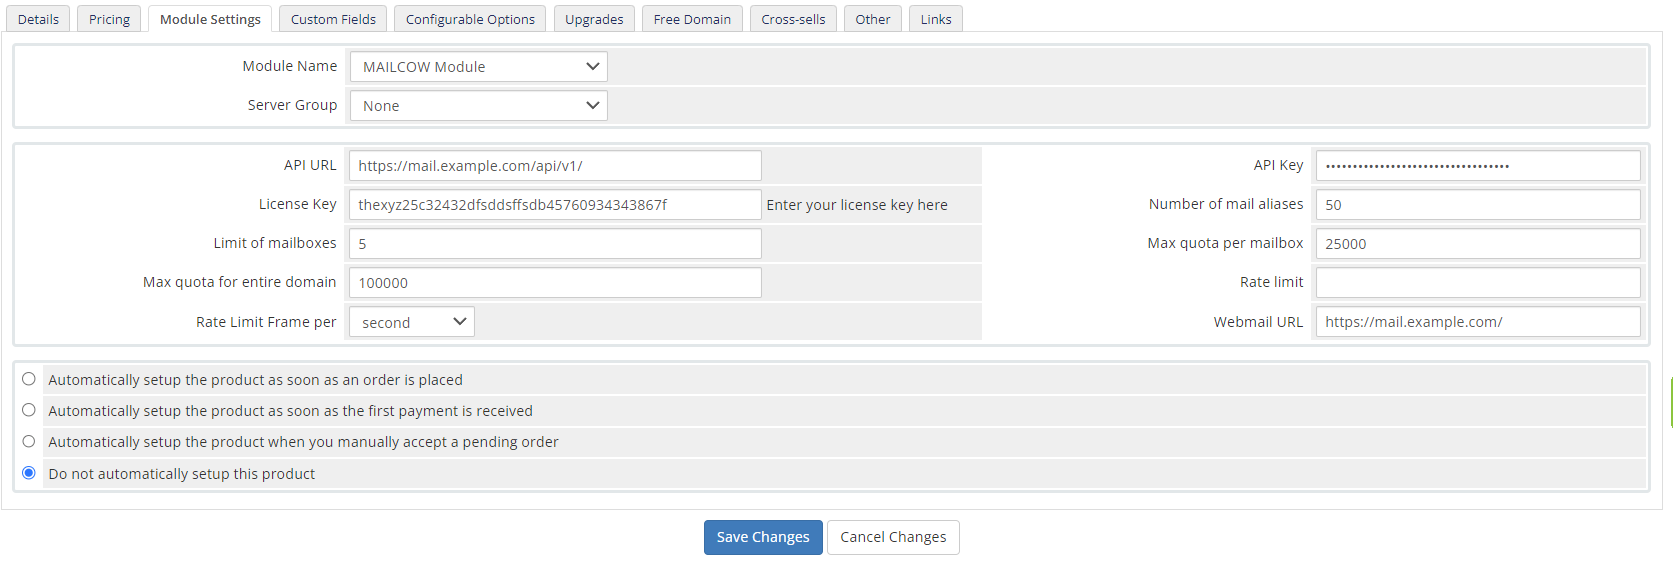
- Fill in the necessary configuration options:
- API URL: The URL of your Mailcow server.
- API Key: Your Mailcow API key.
- License Key: Enter your license key here.
- Number of mail aliases
- Limit of mailboxes
- Max quota per mailbox
- Max quota for entire domain
- Rate limit
- Rate Limit Frame per
- Webmail URL
5. Languages
You can change the default English language by adding a new translation (if your WHMCS language is other than English). To do this:
- Navigate to
modules/servers/mailcow/langdirectory in your WHMCS installation. - Copy the
en.phpfile and paste it as a new file with the abbreviation of your language, e.g., "Swedish" -> "sv.php". - Edit the fields containing the text after the
=sign. Remember to change only the content within the quotes.
6. Admin Area
Administrators can manage the Mailcow module for specific orders. The following actions are available:
- Create: Create a domain for the user. Without a domain, the user cannot create an email address/alias.
- Suspend: Suspend the module, making the service and Mailcow module inaccessible to the user.
- Unsuspend: Reactivate the service and Mailcow module.
- Terminate: Remove the user’s domain from Mailcow and stop the service.
- Change Package: Update configuration settings. The administrator can select automatic updates for each user or manually call it using the Change Package button.
To use these options, navigate to the Orders tab, select an order with an active Mailcow module, edit the order, and use the "Module Command" section to perform the desired action.
7. Client Area
If the configuration is correct, customers will see the following options in the My Services tab:
- Mailbox Management
- Alias Management
In the Mailbox Management tab, customers can view their email addresses. They can also delete or edit an existing email address using the action buttons:
- Edit: Blue button with a pencil icon
- Delete: Red button with a trash icon
Customers can create new email accounts, but the parameters must comply with the module configuration. For example, if the mailbox limit is set to 1, the customer cannot add more than one email address.
The Alias Management tab works similarly, allowing customers to manage their email aliases.
